
Preface:
I write this as a “one newb to another” post and feign absolutely no claims of expertise regarding film development. If you are looking for an expert this is not the place. But if you are looking for a journal of overcoming apprehensions regarding color film development with only a limited B&W monobath background and an “I think I am alright at following directions” with a dash of “What is the worst that can happen? Ruin some film and memories?” attitude this may be the right place.
I was unsure how to approach this write-up.
Make individual posts about the color developing experience, reviews of the Cinestll CS 41 2 Bath and the TCS1000, and another with photo samples?
or
Make one massive blog post about the whole experience with reviews included?
But after some thought, I decided on the latter since I find it difficult to write about one of the four things above in isolation without mentioning the others so here we are.
Said another way, this bad boy is going to be loooooong.
But first why even do this? And by this, I mean developing color film myself.
Others may have a need. Perhaps they do not have a camera shop nearby. But I have a fantastic local camera shop that develops color film for only $5 a roll (I scan for myself already saving another $10 a roll) with a fast turnaround time. Cost-effective and quick. So I technically have no practical need to do this myself. But I still want to. Why?
- Because I want to.
More? Ok.
- Film photography is largely a therapeutic exercise for me. The more I can do myself the better.
- There are times when it would be nice to develop film for myself instead of making a drive or waiting until the shop opens.
- If one did not have a camera shop nearby that you actually enjoy visiting this is a great option.
- …but for me still mainly because I want to. I can come up with plenty of excuses to visit the local camera shop. Still my preferred way of buying gear and film.
For my Cinestill df96 B&W monobath developer review for KEH, I ended with a shopping list. This time around I will start with a shopping list just so you know what you are getting yourself into with this jaunt further down the analog rabbit hole.
What I had already.
Since I was already developing B&W film myself I already had this stuff, but if you do not have it you will need to get these items. I added links to the specific items I have where applicable, but other options will do just fine.
- Thermometer
- Any will do that is long enough for the bottle.
- Development Tank
- Changing Bag
- Scissors
- Any will do. Better if not sharp-nosed since it goes in the changing bag.
- Bottle Opener
- Measuring Cup
- Up to 1000ml at least.
- Funnel
- Any will do
- Clips to hang film to dry
- I bought four large binder clips most recently and they work better than the purpose-built clips I had used before.
Loading the tank is a part of the process that applies to any film development. At the start loading film into the tank is tedious, but soon becomes very easy with practice. The very high-level list is below:
- Open film canister.
- Load film on to reel
- Insert reel into and close tank
There are a lot of great articles and videos just a Google search away, including this one from Cinestill.
In the end, practicing with my eyes closed and then going for it is what really built up my confidence level.
Sidebar: This may just be me, but I have recently realized that I still close my eyes when using the changing bag. Utterly unnecessary, but I am slower at it with my eyes open oddly. Not recommended. Just where I landed.
Honestly, I spent more time practicing and building a comfort level with the part above than anything that follows. The rest largely involves buying stuff and paying strict attention to instructions.
What changed my mind about color development?
Above the convenience and friendly atmosphere of my local camera shop I had avoided color development for a while mainly for three reasons:
- Temperature control.
- A large reason why I went ahead with B&W development was when I found out how forgiving it is with temperature. Had heard that this was not the case with color film.
- Also, B&W development only requires 75 degrees which can be easily achieved by just putting the developer in a running bath of hot tap water. Not so much with color development requiring 102 degrees.
- Timing.
- A large reason why I went ahead with B&W development was when I found out how forgiving it is with timing. Have had a few absent minded moments which were easily dealt with by simply keeping it in the development a bit longer. Had heard that this was not the case with color film.
- Steps.
- I admittedly glazed over a bit when first watching color development videos years ago. Seemed so much more complex then.
Cinestill to the rescue on both fronts. The Cinestll TCS 1000 promises goof-proof temperature and timing control and CS42 promises a 2-step color development path. Or only one step more than what I am currently doing with B&W.
New stuff
Cinestill does sell a kit that simplifies purchases immensely. In theory. It was out of stock at the time of purchase and I had a bit of a strike while it is hot color film developing fever at the time. There is no way that sentence ever sounds cool… but here we are. Anyhoo. It does make for a great shopping list starting point though. Other items will also be needed. Another issue with the kit for me was that I already had some of the components in the kit. But perfect if you did not have the head start gear above. Ok, “issue” may be strong. But as a result, I bought the individual components piecemeal here and there online and locally for about the same price as the kit.
Here is what I needed in addition to the items above.
Will start with what I sourced locally:
- Plastic Tub
- Marched into my local MegaLoMart with the dimensions of at least 16 x 12 x 7″ as specified and found exactly one storage tub in stock that met the bill with being over large and it fit the bill perfectly.
- I liked this tub in particular even though it was not wide enough to make use of the included clip because the side aligned perfectly with the TCS 1000’s clamp and it was tall enough to sit all the way in the tub with sufficient clearance underneath as required.
- Did not hurt that it only cost $7.78.
- That being said many a tub will do.
- Gloves
- This one initially went into the “pfft, gloves?” category before snapping out of it and buying some medical gloves from my local MegaLoMart while picking up the tub.
- Am I really going to risk the consumption or other ailment (I did no research past buying gloves obviously.) over $5.98? No.
- Distilled Water
- I did not even know this was a thing until I started developing B&W film.
- Not as important as w/ B&W evidently and managed to cause a moment of error code confusion out of the gate.
- Labels (Jug and Top)
- Masking Tape and a Sharpie were found around the house in my case (by my wife admittedly), but I have seen folks use labelers as well.
Purchased online:
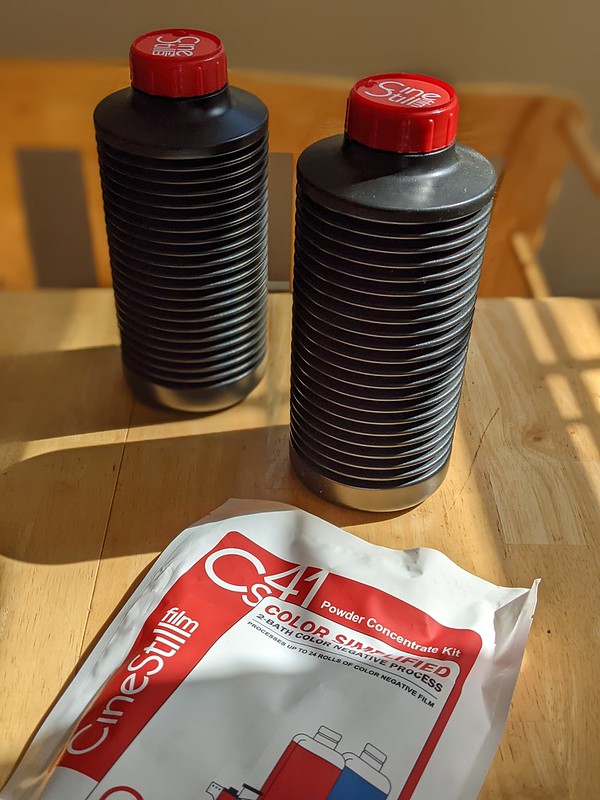
- CineStill Film Cs41 Powder Developing Kit for C-41 Color Film
- The star of the show… Ok, one of two stars.
- I got into the habit of buying powder with df96 since it makes shipping easier and less expensive than liquid when my local camera shop is out of stock.
- Liquid works as well in both cases and comes with Stabilizer/Final Rinse included, which the powder does not. But more on that later.
- But unlike df96 which comes ready to go no extra steps are added for powder here.

- 2 x Bottles To Hold the Developer and Blix (Bleach and Fixer)
- Technically any 1,000ml plus bottles will do, but since both light and air seem to be mortal enemies of these chemicals I would say just buy the Cinestill variants since
- These purpose-built ones cost just $10 so I decided to just go with them.
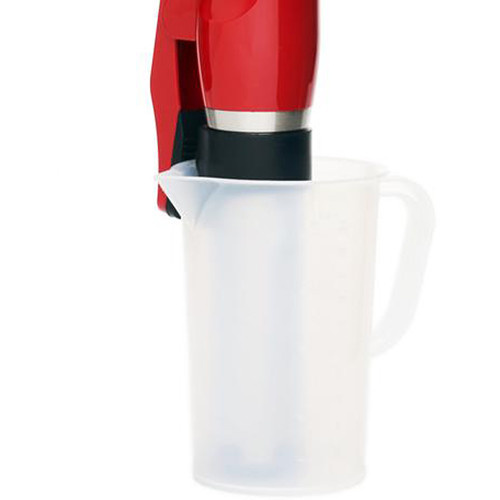
- 2 x CineStill Film °Cs 1000mL Mixing Jug/Pitcher
- Why 2? Every article I have read makes it abundantly clear that comingling of Developer and Blix is bad. Likely not necessary, but I was looking to eliminate a potential pain point by keeping them completely separate when mixing. I was likely being overly cautious but at a very reasonable $3.95 a piece why not?
- Why this jug when any will do? To ensure I had a jug that played along with a key benefit of the TCS1000. More on that is below.
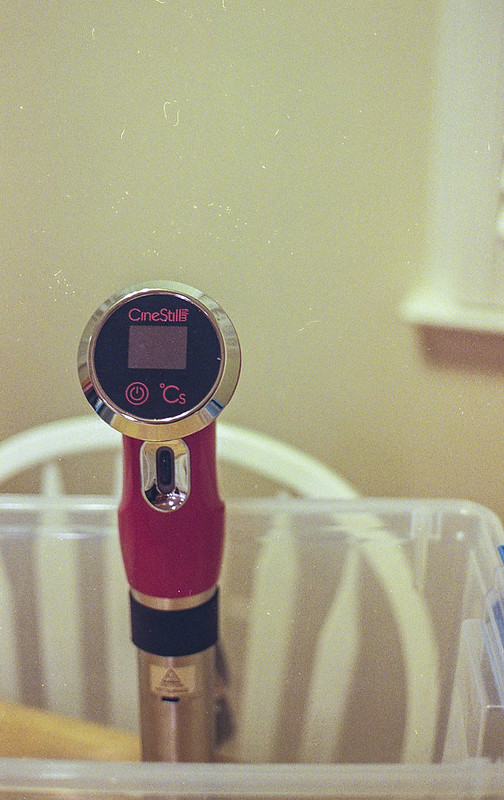
- Cinestill Film (TCS1000) Cs Temperature Control System
- The star of the show and the main reason I decided to give this a go.
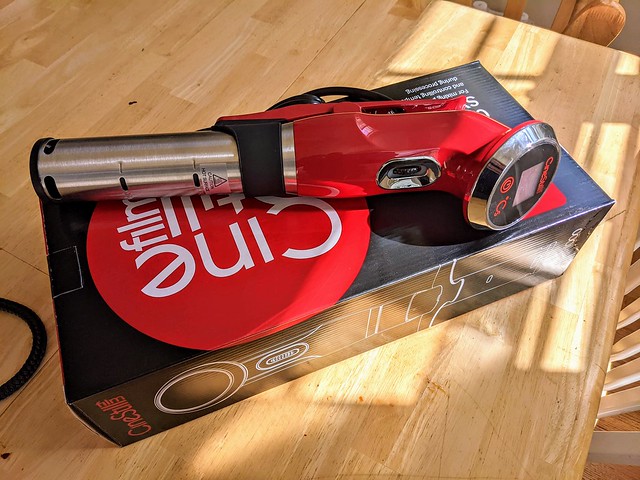
Neither Cinestill nor B&H had the standalone TCS1000 for sale at the time of my purchase so I sourced it online from Samys Camera based in California and it went well. Will be shopping on their website again. Same price regardless.
Ok. Acquisitions are out of the way.
The experiences of using the TCS1000 and the CS41 are so interwoven that rather than a formal review of each I will walk you through my learning curve by way of experience step by step.
- Read Instructions for CS41 and TCS1000 all the way through.
- Read them again.
- Did not want an avoidable gotcha moment in the middle of the process once started.
- Watch this video a couple of times.
- Label the light-proof bottles and tops.
- Labeling both the bottles and tops paid dividends immediately.
- At first, I thought, “Surely I will not mix these bottles and tops up.” Fast forward to later in the evening and there I was with the tops off of both bottles unsure of which went with which until I looked at the tops and bottles.
- Took many decades, but I have reached an age where I just do as suggested rather than second guess everything and I am often rewarded.
- Mix the chemicals.
- Did this first so I could kill some time loading the film into the tank so I would not sit there and stare at the chemicals while they were heating up… much.
- This is where the jugs I mentioned earlier came into play. The Cinestill jugs are made such that even with the TCS1000 clipped to the side they will both stand on their own and not topple over.
- Add water, insert the TCS1000, and off it goes*.
- *This is where I hit the error code mentioned earlier. I used distilled water only thinking this was a good thing, and I received E03 on the TCS1000. After perusing the troubleshooting part of the instructions under E03 I saw words, words, and a few more words, add tap water… What? So now I know why it was not explicitly stated to use distilled water. Thankfully they put in an Eric addendum so I would not be stuck here forever. Why? Something, something, aerated, something. There was no more room in the Inne for more words at this point. It works. Moving on.
- I cannot state adequately in words how much I appreciate this mixing feature. As posted recently I experienced development issues due to my not mixing stage 2 of the df96 fully. This is a much better mixing method and would have avoided that entirely.
- Transfer the chemicals to the bottles.
- Done as you mix them individually.
- Blix instructions actually use the bottle as a part of the mixing process because something, activation, something…
- Start heating the chemicals.
- By far the longest part of this process.
- Simple enough.
- Make sure water is between the Min and Mx marks on the TCS1000.
- Plug it in, and wait for confirmation beep.
- Hold power for 2 seconds to power on.
- You can adjust the temperature and timers, but it is set for color development by default and I saw no need to change a thing.
- Press the power button again the heating process begins.
- That is it. Off to put the film in the tank.

- Load the film in the tank.
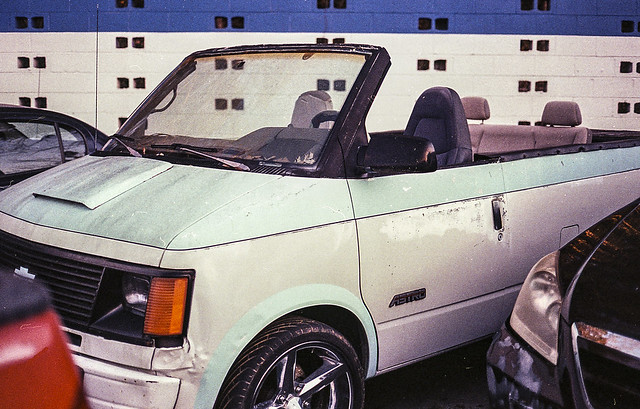
- My test roll film of choice was the thrifty, yet excellent Kodak Gold 200. A favorite of mine. Ran it through a favorite camera/lens setup that is about as foolproof as they come to eliminate as many margins of human error as possible. No worries about blown exposures and missed focus anyway. Framing is still up for grabs.

- Wait.
- The actual process of heating the water in the tub did not take long at all. The wait was mainly checking the chemicals in the Developer bottle until they reached the desired temperature**.
- **I trust the TCS1000 more than a meat thermometer of questionable age, origin, and accuracy. Even though the TCS1000 showed 102 degrees for the longest the thermometer only ever reached 100. Once it sustained that temperature for a time I concluded that the actual temperature was where I needed it to be. Getting this reading also required me to collapse the bottle slightly since the thermometer could not reach that far… It is now officially time to replace this freebie thermometer.
- The actual process of heating the water in the tub did not take long at all. The wait was mainly checking the chemicals in the Developer bottle until they reached the desired temperature**.
Let the games begin!
- Pre-Soak (Optional) – 1 minute/102 Degree Water
- I started out with the optional pre-soak using heated water from the tub.
- Here and everything below is straight out of the manual. No surprises or heroics here.
- Was surprised how much the color of the water changed, but also please note that I have no frame of reference here since it is my first time doing this.
- Developer – 3:30 minutes/102 Degree Chemicals
- Once the chemicals are up to temperature press and hold the “Cs” button.
- The 3:30 timer starts and you add the developer.
- As instructed agitate for 10 seconds at the start and 4 times every 30 seconds after that.
- To keep the chemicals at temperature I mostly kept the tank in the water also.
- Once I poured the developer from the Developer bottle into the tank I moved it away from proceedings just in case since the temperature in the bottle no longer mattered. Had read that just a touch of Blix in the Developer can ruin it so I wanted the two bottles nowhere near each other when I opened the Blix. Overly cautious perhaps, but I figured better safe than sorry.
- Switch – 30 seconds
- A beep signals the end of the developer cycle and you have 30 seconds to change chemicals.
- Pour the developer out of the tank and back into the Developer bottle.
- Pour the Blix into the tank.
- At any time you can pause/start proceedings by pressing and holding the “Cs” button for 2 seconds.
- Do not fast press the “Cs” button to pause unless you just want a momentary panic because this puts you into adjust settings mode. If you do, as I did, just keep pressing “Cs” until no timer prompts are blinking… then press for 2 seonds to pause/start.
- Bleach and Fix – 8:00 minutes/102 Degree Chemicals
- At the end of the 30 seconds the 8:00 blix timer begins.
- As instructed agitate for 10 seconds at the start and 4 times every 30 seconds after that.
- To keep the chemicals at temperature I mostly kept the tank in the water also.
- I left the Blix bottle in the tub to keep the water level above the Min marking on the TCS1000.
- Above Max and below Min the TCS1000 will shut off automatically.
- Wash – 3 minutes/75-105 Degree Water
- According to the manual the remaining steps do not require darkness… butl I left the film covered in the tank.
- Running water or fill/empty tank 7 times
- I did not trust that I had enough water in the tub to fill/empty the tank 7 times so I mixed the tap water to within the stated range as verified by the thermometer and ran it for 3 minutes.
- Stabilzer/Final Rinse – 1 minute/Room Temp Water
- Agitate for first 15 seconds.
- I ordered stabilizer, but had not waited for it to arrive since I read that modern films include stabilizer… and because I am impatient. Instructions said that distilled water could be used instead and that is exactly what I did. No ill effects witnessed so far.
- Your mileage may vary. I keep the negative sacns, but I do not archive the physical negatives so this was not a massive concern for me. If I ever decide to start printing from negatives this will change.
- Dry
- A straightforward affair.
Before I get to the scans I wanted to make a few notes.
- Not entirely sure what happened, but a few odd, very small “sticky” spots appeared on two negative frames. Once noticed they were easily dispatched with a non-approved technique that I will not admit to here. After that the two negative frames in question dried without issue. I did see that the tip I cut off of the film had made its way into the tank. My theory is that this tip was caught between the film layers in the tank causing chemicals to stay attached. Theory only. The only ill effect on the two frames impacted was that a little more dust cleanup was required later on in post. This has never happened to me before and I will have to be mindful of this in the future.
- Likely a function my using distilled water for the rinse rather than it being color film I found that the negatives dried more quickly and with less residue than I had seen with B&W film in the past. As a result I will be adding a distilled water rinse when I develop B&W film from now on also.
- Not sure if it is the nature of color film in general or Kodak Gold 200 specifically, but I did not need to use the second binder clip to weigh the film down when drying and the film was flatter and straighter than any B&W film I have used which made scanning a breeze.
- Clean up was easy. Flush trhough two tanks during when switching chemicals and minor assembly for an end of process clean followed by standing it up for drying.
- Also the tub makes for great storage afterward.

Sidebar: The Sous Vide in the room. Have read that some say that any sous vide could be used instead of the TCS1000. The TCS1000 even favors a less expensive sous vide a bit aesthetically. Technically I agree, but I think the TCS1000 adds value with the built-in timers alone. In addition, I have watched a video where Cinestill asserts that the TCS1000 is purpose-built for film development and mixing chemicals. Just talk? Perhaps a bit. But I am sold.
But none of this matters if the negatives do not look good.

And they do. They look great.
As good as $5 machine processing?
Honestly yes.
Colors.
- Look good to me.
Grain
- Looks good to me.
Sharpness
- Does well even with the very sharp Contax G Zeiss Planar 45mm f/2. No small feat.
Low light/Night Images
- Looks good to me.
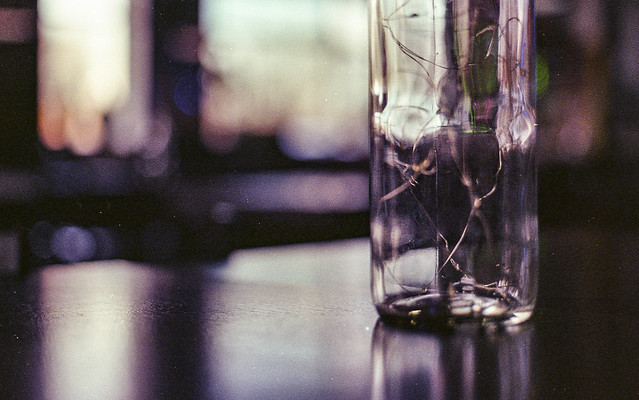
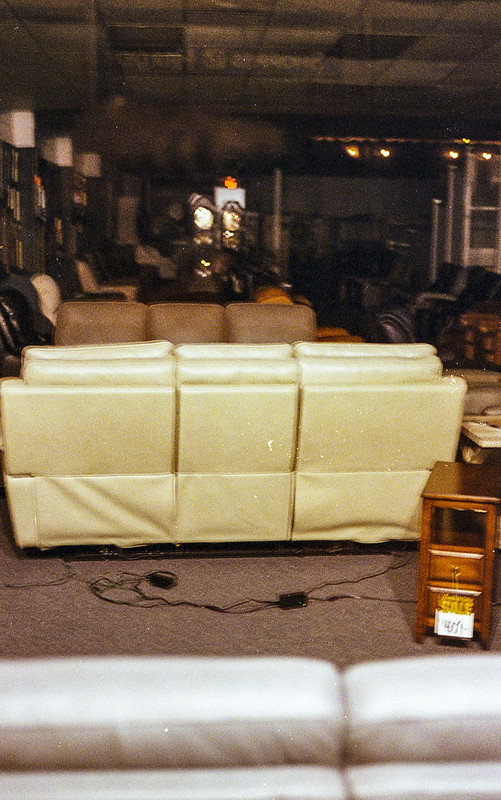
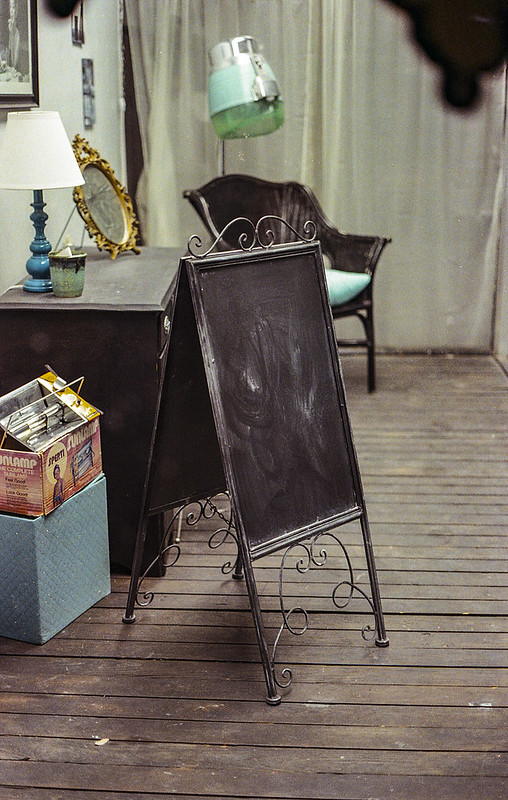
Enough with the words. Here are the sample photos. Posting all photos (37 as the G1 produces) good and the user error (shaky low light photos) afflicted.


Final thoughts.
I count this as a great success. Developing color at home will definitely become a regular part of my photograph[hy workflow.
Well done Cinestill.
-ELW

202 Replies to “Developing Color At Home Made Easy: Cinestill CS41 2 Bath and TCS 1000”
Comments are closed.