
A few years ago I picked up a Pentax K-70 and 18-135mm WR APS-C kit. I needed another camera like a hole in the head since I had moved to another system from Pentax. I bought it mainly because of the great price, but it was a great combination. Both the camera and the lens…


…proved to be great performers. I liked them so much that they inspired me to take a more creative approach to the product shot for the post. Since the lens had a green detail ring I chose to light paint with a green highlight using the Yongnuo YN360. As I mentioned in that post:
- RGB colors and those in between (purple shown as an example) by allowing each to be adjusted individually.


For something like this near any camera will do. As one would expect you need to set the camera up to cancel out the existing light. I chose the NX300 and used the following settings:
- ƒ/22
- 3″ exposure
- ISO 100
My goal was to highlight the Pentax and K-70 logos on the camera, the marking on the side of the lens and the front lens element. I placed the K-70 on a chair, put the NX300 on a sturdy tripod, shined the YN360 on the camera briefly to highlight the front of the element and badges, then swept the YN360 behind the camera as smoothly as I could. It took a few tries, but I landed on this.
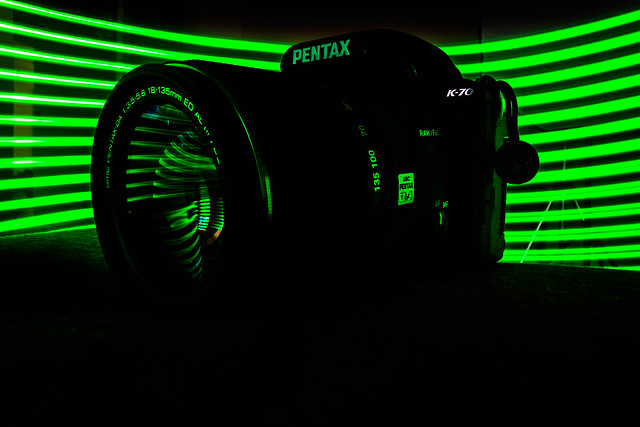
While pleased with the results I have looked at this image a few times and there are things I would change if I did it again.
- On the right of the camera you can see tripod legs behind the highlight green light.
- A 3″ exposure left enough light that I needed to use Lightroom to darken the top and the bottom of the image to cancel out light from the room.
- Turn the lights off in the room completely.
When I recently picked up a K-1 based on my experience with the 18-135mm I picked up the similarly designed and spec’d FA 28-105mm WR lens. I lucked up and found one used at Adorama. While not as long as the APS-C lens it offered the same great performance. With the same green ring design theme I felt a do over was in order. But this time I wanted to make some changes:
- To feature the camera more prominently I added a second LED light I picked up from Amazon. That light is capable of colors also as well as effects but I just wanted standard issue 5000k light for this shot.
- With this additional light I chose to use a white platform.

- This time I would use the green highlight to completely cover the background.
- To reduce light more I turned the lights off in the room and draped black material behind it.
I also switched to the A7c this time. First off using two lights required a bit more juggling this time. But fortunately with the setting adjustments I made to eliminate ambient light I had plenty of time after some practice.
- ƒ/22
- 6″ exposure
- ISO 50
After some trial and error I found that I needed to start the exposure with the 5000k LED facing the lens to pick up light in the front element, then briefly hold it over the camera to provide sufficient light for the lens and camera while lastly sweeping the YN360 behind the camera. The result?
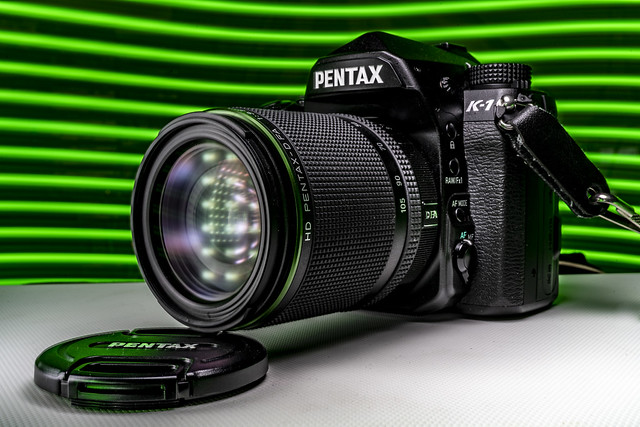
This photo required much less Lightroom action than the last one. I brightened the bottom right right corner and raised the exposure over the camera controls near the lens. A few other minor tweaks of the blacks and whites and I was done.
Final thoughts.
I will be doing more of this going forward. This second experience has given me some more ideas I hope to try out soon.

2 Replies to “Product Shot Light Painting Take 2.”
Comments are closed.